Calendar Steps for iOS: Difference between revisions
Jump to navigation
Jump to search
No edit summary |
No edit summary |
||
| Line 13: | Line 13: | ||
| Tap and hold in the server box, then choose "Paste" from the small popup, then tap "Next" || [[File:ios-calendar-step6.png|200px]] | | Tap and hold in the server box, then choose "Paste" from the small popup, then tap "Next" || [[File:ios-calendar-step6.png|200px]] | ||
|- | |- | ||
| Change the description of the calendar if desired, then tap the "Save" button || [[File:ios-calendar-step7.png|200px]] | | Change the description of the calendar if desired, then tap the "Save" button. '''Ensure you do not change the "Server" field.''' || [[File:ios-calendar-step7.png|200px]] | ||
|- | |- | ||
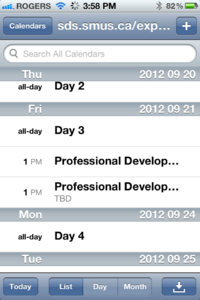
| Run the Calendar app and you should now see your calendar items || [[File:ios-calendar-step8.png|200px]] | | Run the Calendar app and you should now see your calendar items || [[File:ios-calendar-step8.png|200px]] | ||
|} | |} | ||
